Azure
Configure Azure Entra ID as an Identity Provider Walkthrough
Step 1. Create Vega Platform SSO Configuration
- Log into the Vegacloud Platform
- Click the gear icon
 in the top-right corner then
 Organization Settings - In Organization Settings click
Single Sign-On - Click on
+SSO Configuration - Leave the radio button for
SAMLselected - Click
Fill With Placeholder Values - Enter a Configuration Name e.g.
VegaPlatformSSO(cannot contain spaces) - Enter a Display Name e.g.
Vega Platform SSO(this will be the display name of the SSO config on the platform login page) - Leave defaults for remainder of settings and click
Create - Click the pencil icon
 next to the newly created SSO Config
 - At the bottom of the config expand
Settings and configuration data... - Copy both the
AudienceandSingle Sign-On ACS URLvalues to a notepad for use in later steps
Step 2. Configure Azure Entra ID as an Identity Provider
- Login to the Azure Portal and navigate to Enterprise Applications
- Click
+ New application - Click
+ Create your own application - In the modal that pops up give the app a name, e.g.
Vega Platform SSO - Select
Integrate any other application you don't find in the gallery (Non-gallery)and thenCreate - Within the left-hand nav menu of the newly created Enterprise Application, select
Manage>Single sign-on - Select
SAML - Click
Editon theBasic SAML Configurationin Section 1 - Click the
Add identifierlink under Identifier (Entity ID) and paste in theAudiencethat was copied in Step 1 - Click
Add reply URLunder Reply URL and Paste in theSingle Sign-On ACS URLthat was copied in Step 1 - Click
Add reply URLto add a second reply URL, modifying theSingle Sign-On ACS URLfrom https through endpoint e.g.https://auth.vegacloud.io/realms/democompany/broker/vegademocosso/endpoint
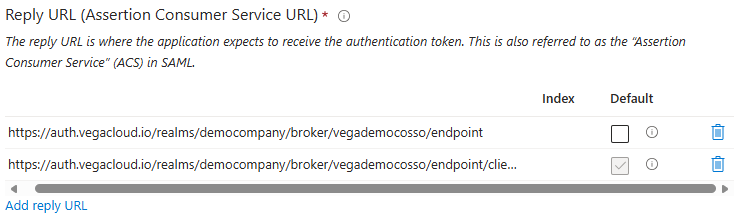
- Click
Saveand then close theBasic SAML Configurationmodal - When prompted to test the configuration, click
No, I'll test later - Click
EditinAttributes and ClaimsSection 2 - Remove all Additional claims defaults by selecting the 3-dot context menu next to each item and then selecting Delete
- Click the remaining Required claim to modify it
- Click the dropdown for
Name identifier formatand change it to typeUnspecified - Replace the
Source attributewith an object or field that represents a user's email address e.g.user.mailand then click Save
| Format | Value |
|---|---|
| Unspecified | Object or field that represents a user's email address, e.g. user.mail |
- Within the
Attributes & Claimswindow, click+ Add new claim - Name the first claim
firstName - Click the carrot next to
Choose name formatand then setName formattoUnspecified - Click the
Source attributefield and select a value that represents a user's first name e.g.user.givenname, then click Save - Repeat steps 20-23 to create the other two additional claims using the table below
| Name | Format | Value |
|---|---|---|
| firstName | Unspecified | Object or field that represents a user's first name, e.g. user.givenname |
| lastName | Unspecified | Object or field that represents a user's last name, e.g. user.surname |
| Unspecified | Object or field that represents a user's email address, e.g. user.mail |
-
Back in the
Set up Single Sign-On with SAMLmenu, Section 3 labeledSAML Certificatescontains a download for the Base64 Certificate- Locate and select
Certificate (Base64)to download - The file is downloaded as a .cer file, but in order to use it, the file format will need to be converted into .pem
- Here is an example file conversion CLI command using OpenSSL:
openssl x509 -in path/to/mycert.cer -out path/to/mycert.pem -outform PEM
- Locate and select
-
Within the
SAML-based Sign-onSection 4- Copy the
Microsoft Entra Identifier URLand save to text editor asIssuer URI - Copy the
Login URLand save to text editor asSingle sign-on URL
- Copy the
Step 3. Finalize Vega Platform SSO Configuration
- Back in the Vega Platform within the SSO Configuration created in Step 1
- Replace the
Issuer URIwith the value from your text editor - Replace the
Single sign-on URLwith the value from your text editor - Click the
Upload Signing Certificatebutton and select the newly converted .pem file and then click Save
Step 4. Assign users to your Azure Application
- Within your newly created Enterprise Application in Azure, navigate to
Manage>Users and groups - Click
+ Add user/group - Within
Add AssignmentunderUsers and groups, clickNone Selected - Using the Search field, locate and select the Users and/or Groups you wish to have access to the SSO application
- Once your have your Users/Groups selected, click
AssignwarningInheritence through Group nesting is not allowed, a user must be a direct member of a Group that is assigned to the SSO application.
Step 5. Test SSO Integration
- Log out of the Vega Platform by clicking your user icon in the corner and selecting
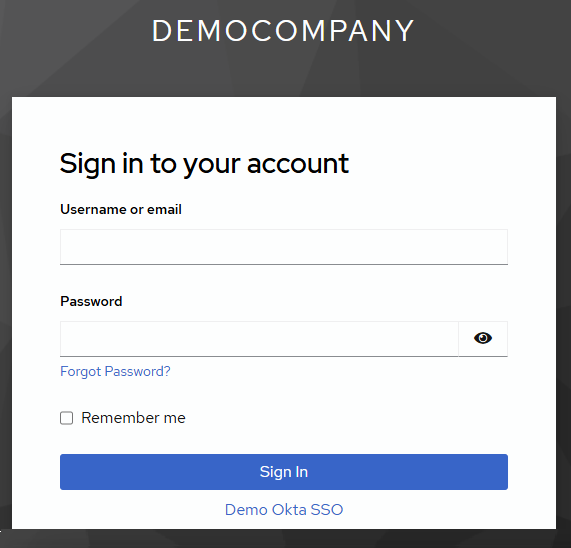
Log outfrom the dropdown menu - Log back in using SSO via
https://<your-slug>.vegacloud.ioor through the Azure MyApps tile - Click the link that contains the display name of your SSO integration under the
Sign Inbutton to login
Support
If you encounter any issues or need further assistance, please contact Vega Support at support@vegacloud.io.
By following these steps, you should have successfully configured Azure SSO with the Vega Platform. Ensure all steps are completed accurately to avoid any configuration issues.