Business Groupings
About Business Groupings
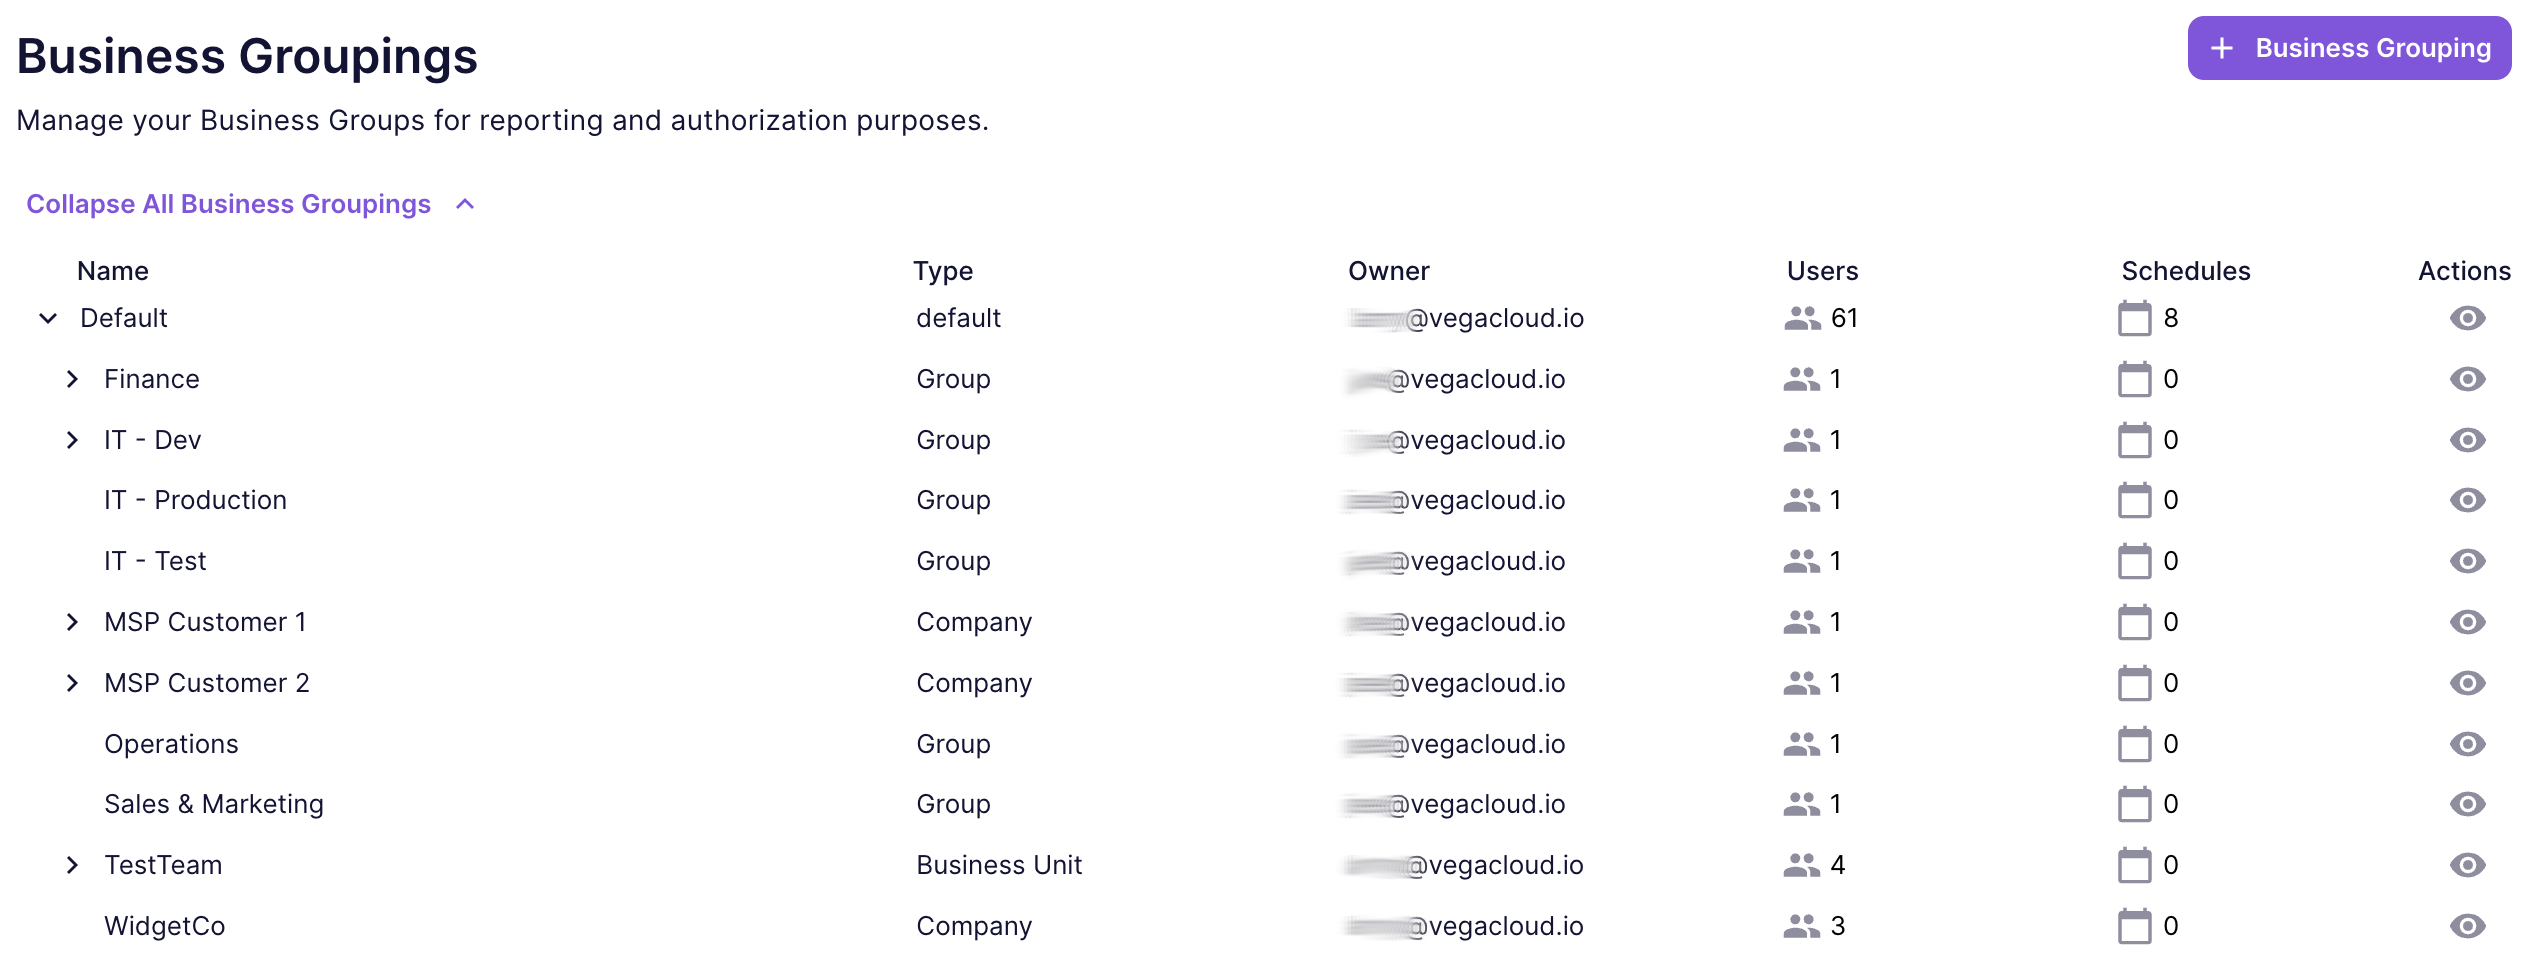
Business groupings allow you to organize different units for access and reporting purposes. Creating a business grouping provides you the capability to add users to the group, define its business grouping type, and with the assistance of your Vega FinOps analyst, limit the scope of data access and dashboard views. Users may be added to multiple business groupings and may be removed from a business grouping at any time.
Default Business Grouping
Your account will have a Default Business Grouping that is created when your account is provisioned. This will be your top level business grouping. This business grouping cannot be removed.
Create a Business Grouping
- Click the "+ Business Grouping" button in the top right corner of the Business Groupings page to open the details page:
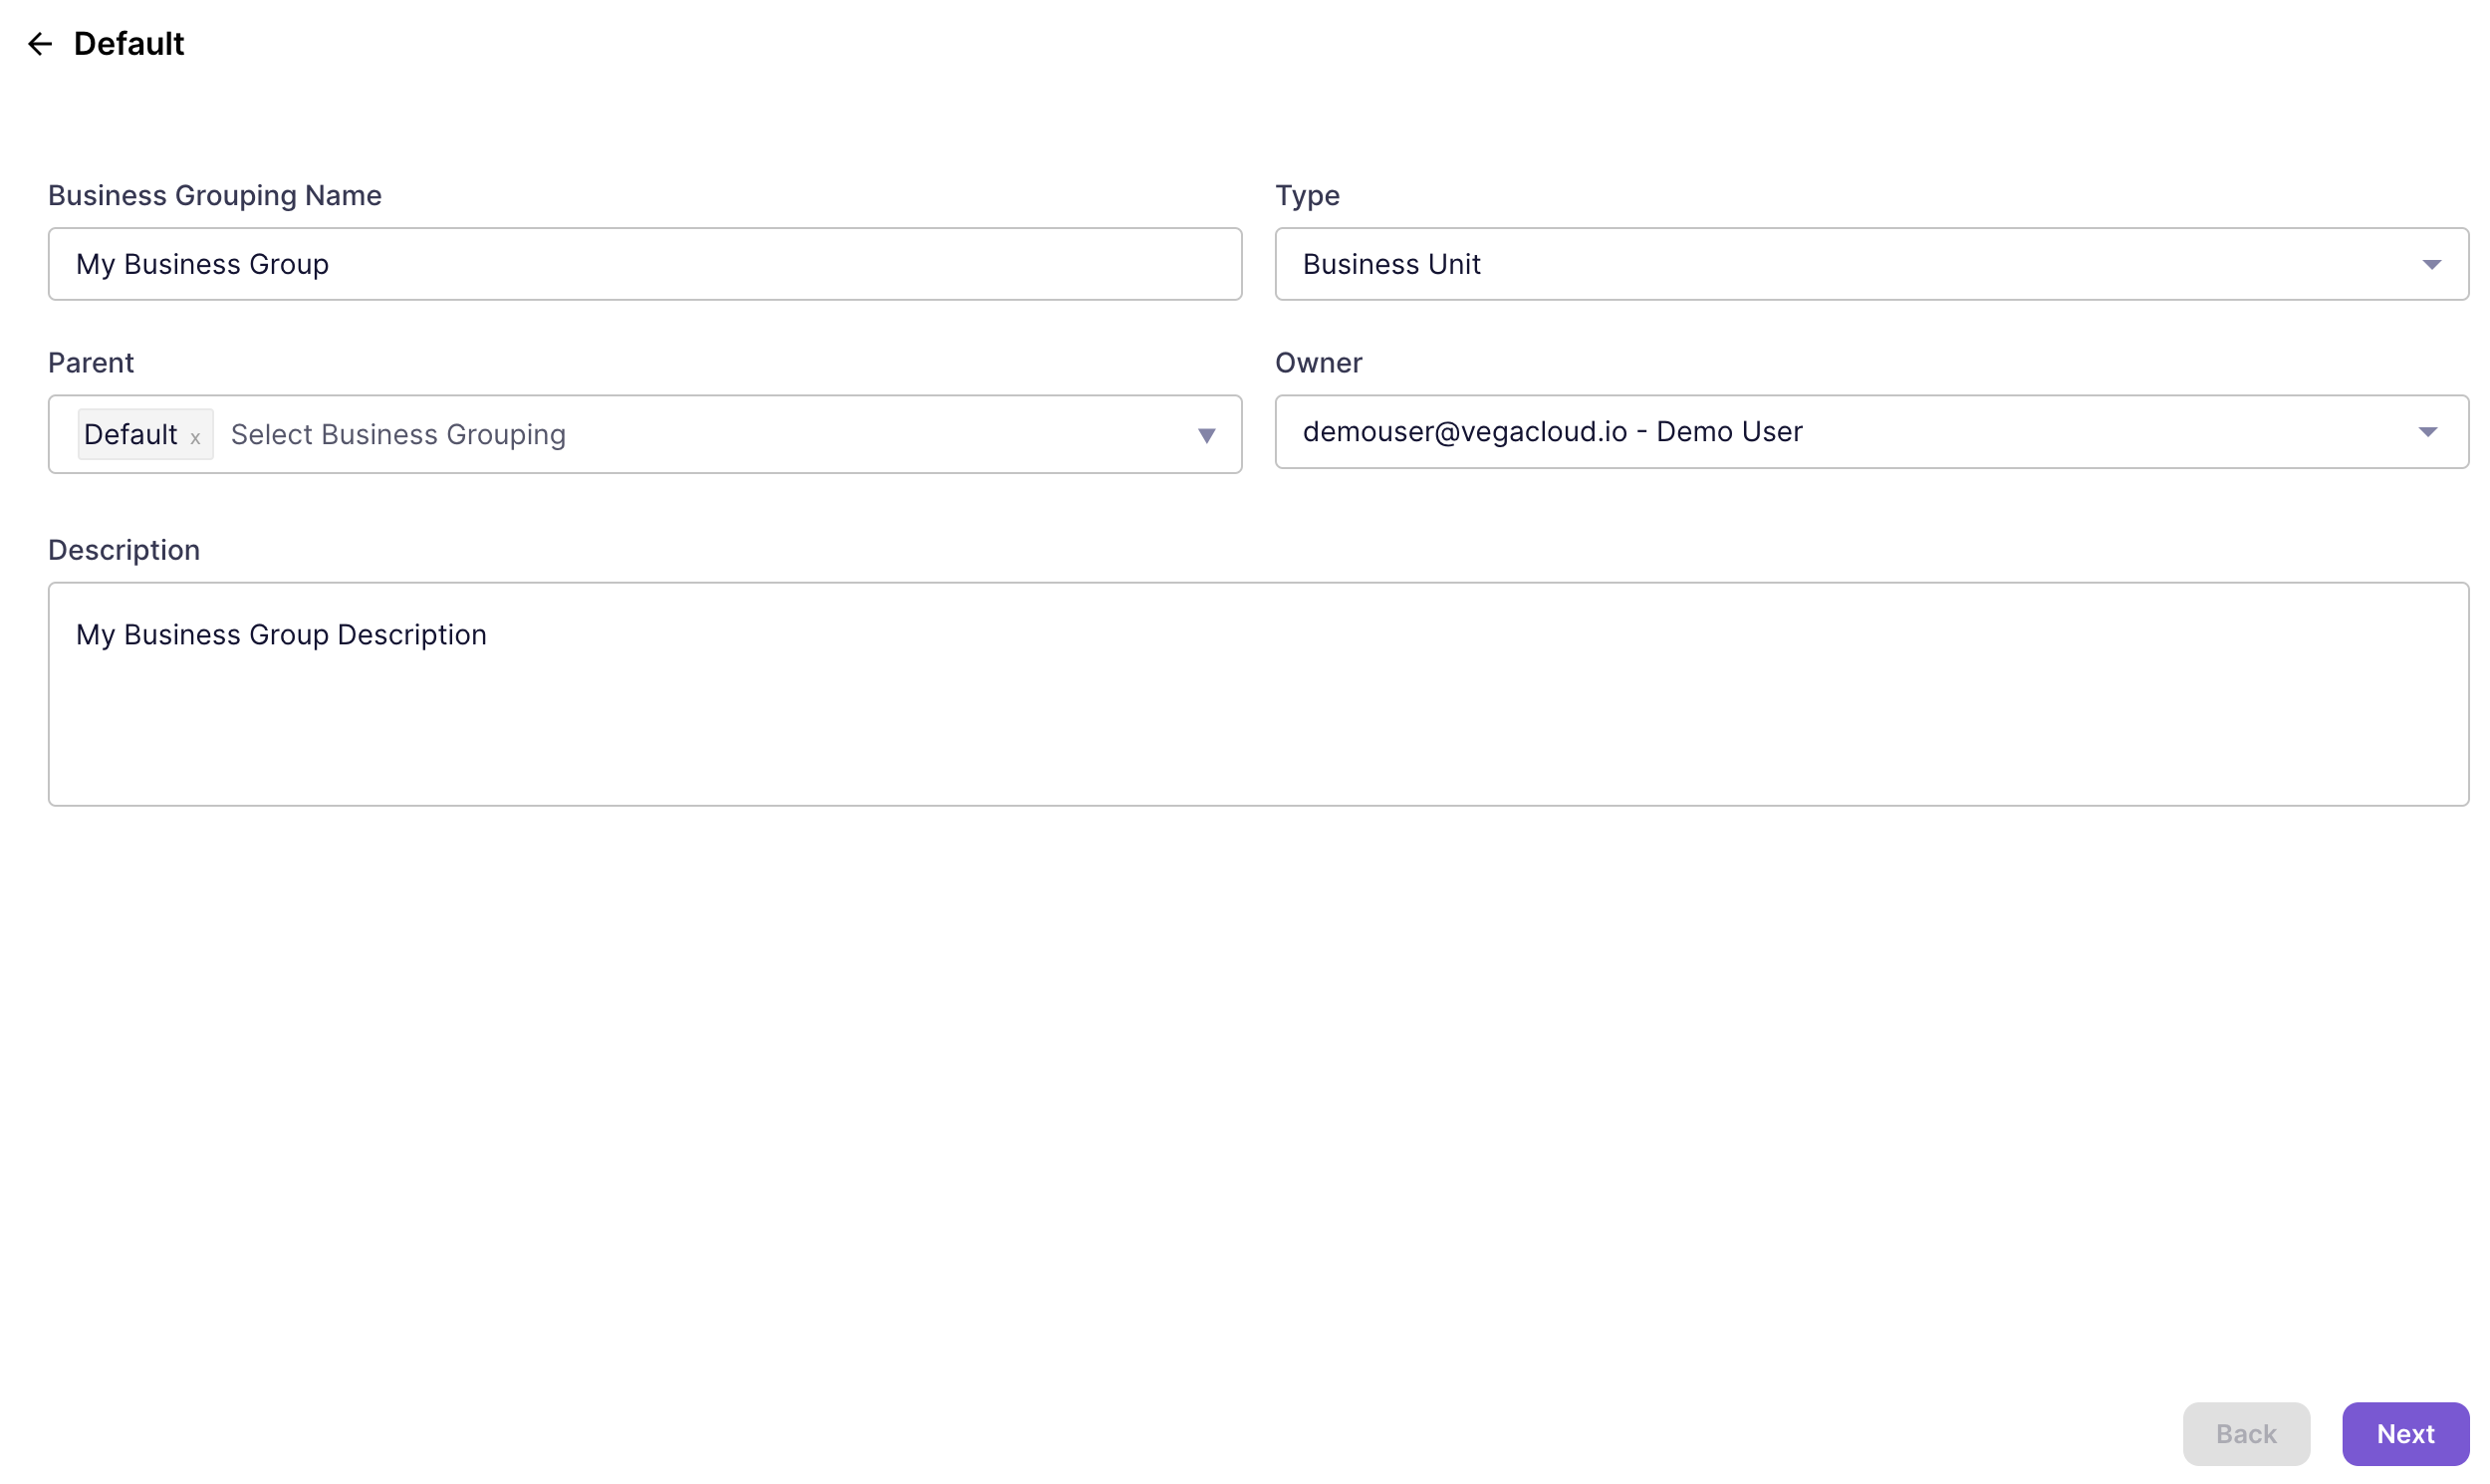
- Enter the following information for the Business Grouping. Click "Next":
- Business Grouping Name (required)
- Type (required)
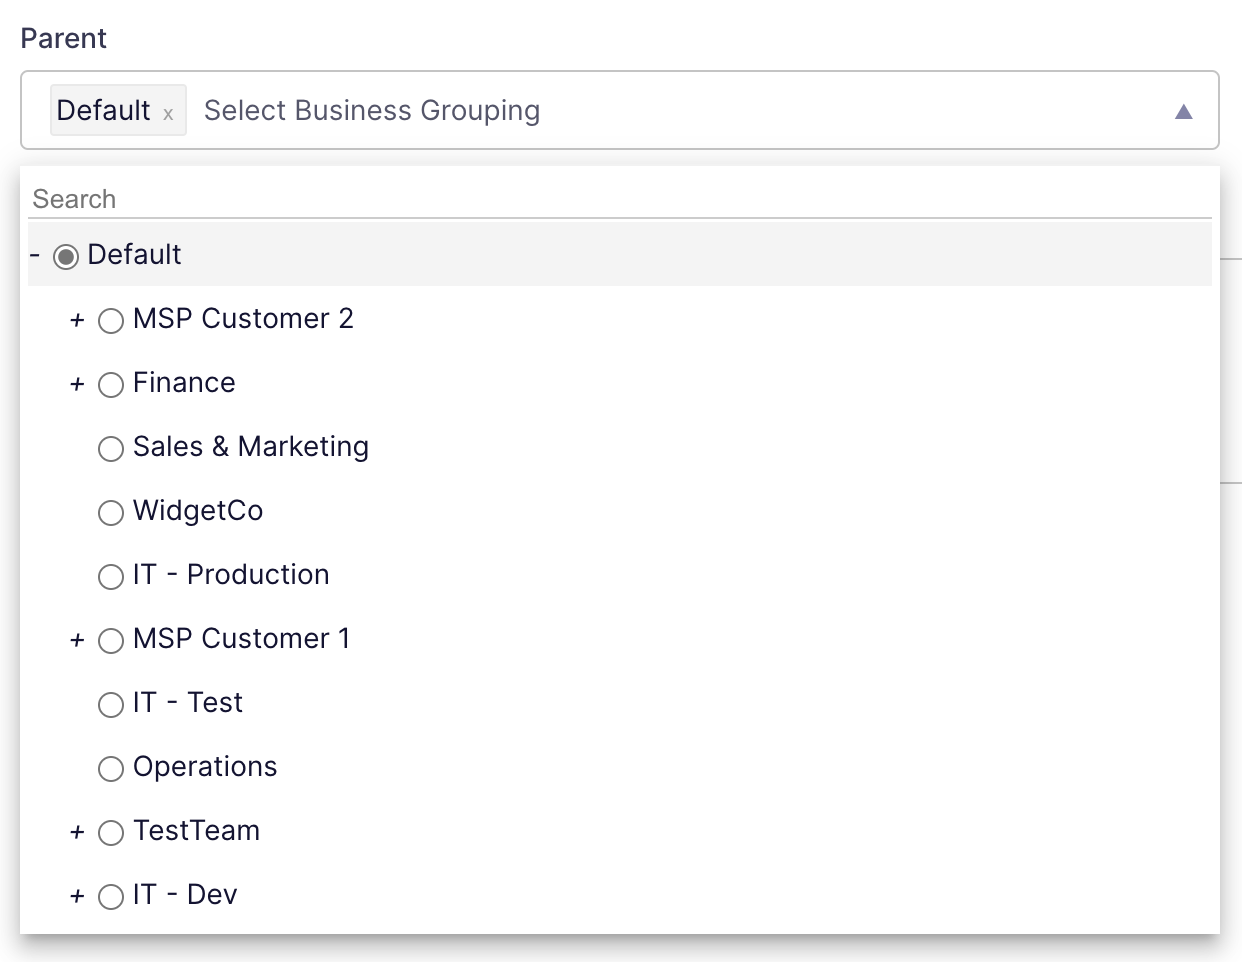
- Parent (required)
- Use the selector to find the correct parent in the hierarchy:
- Owner (required)
- Description (optional)
- On the "Owner and Assigned Users" page, the Owner configured in the previous step will be assigned to the Business Grouping automatically:
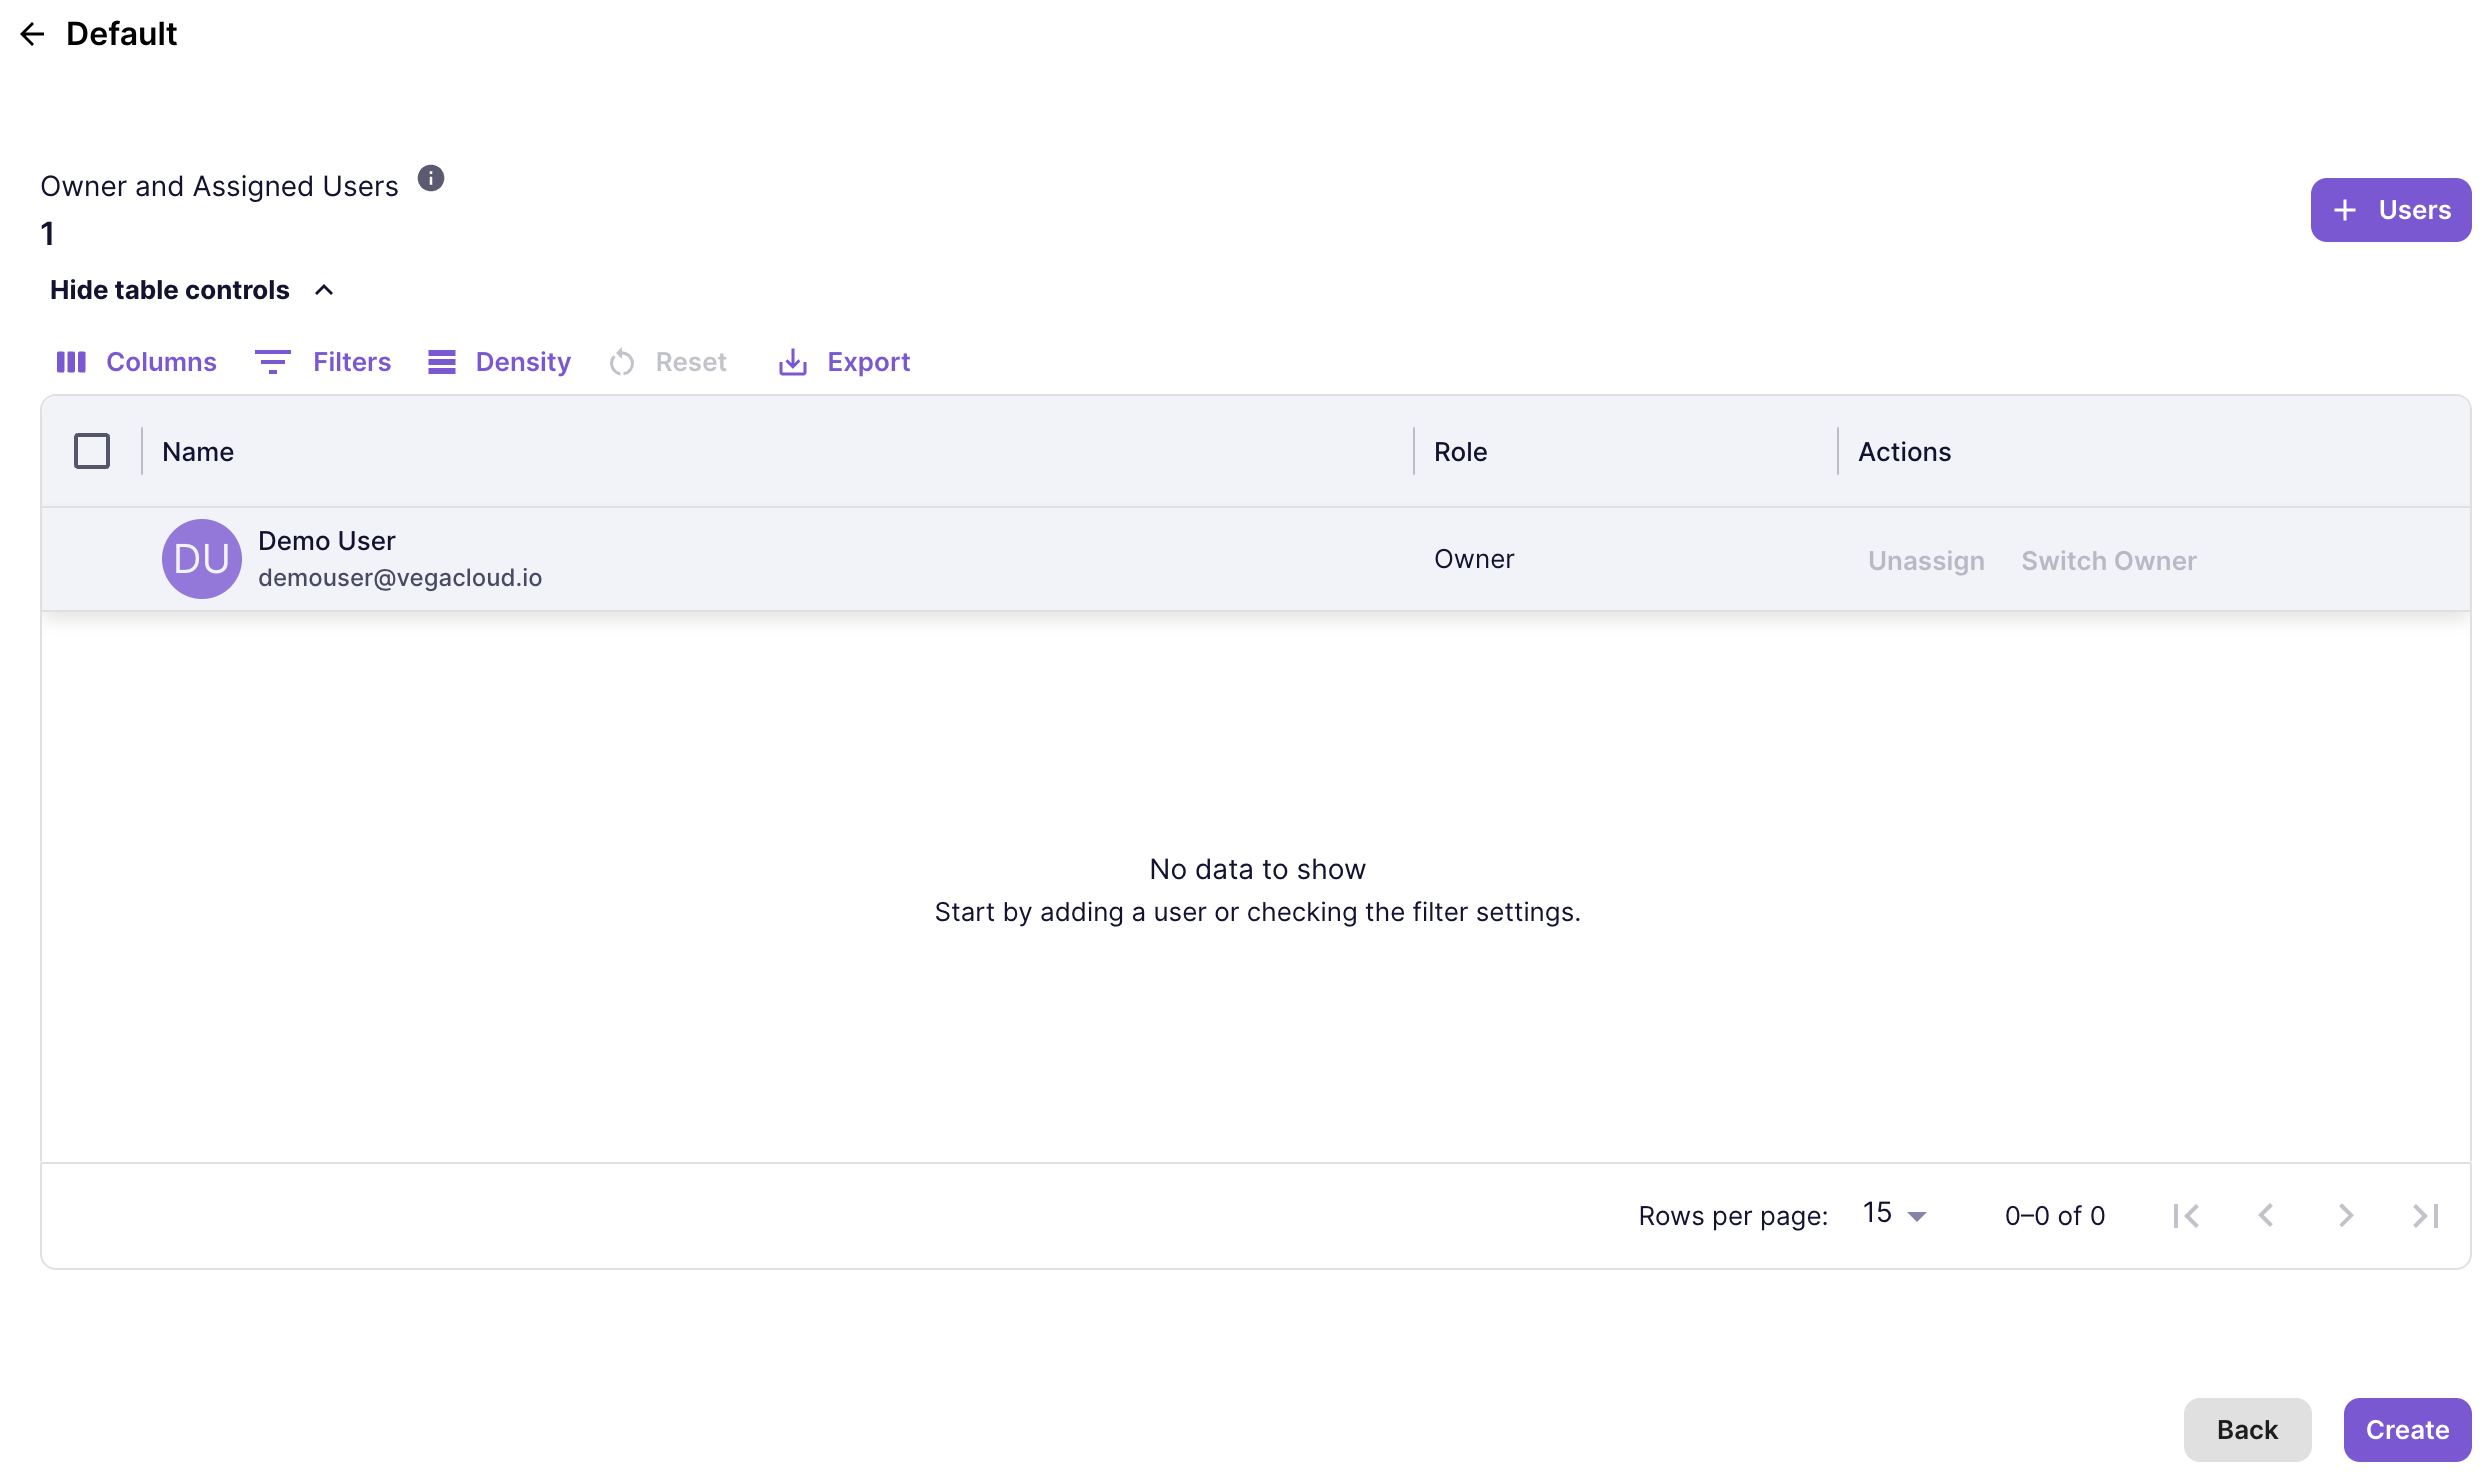
- To add additional users to the Business Grouping, click the "+ Users" button in the top right corner. In the "Assign Users to business grouping" dialog, select the users to assign to the business grouping and click "Assign Users":
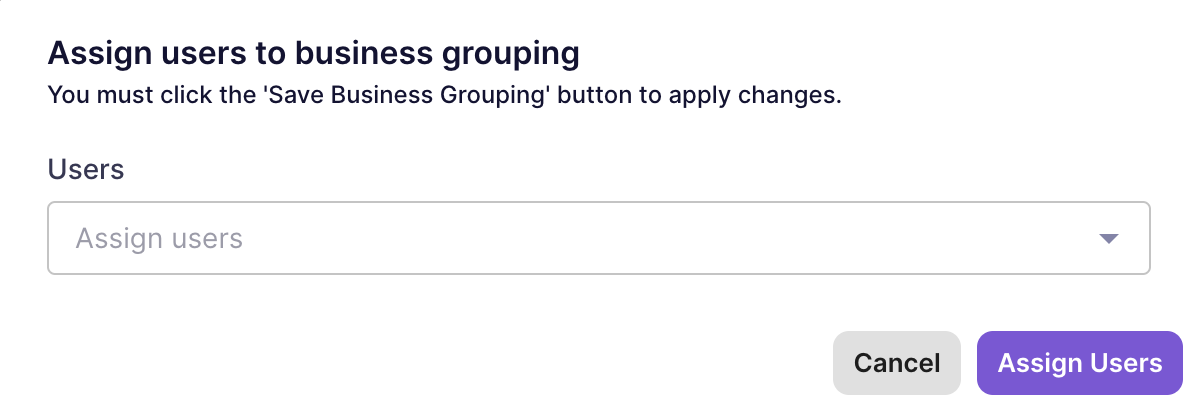
- Once you have confirmed all the users to be assigned to the business group, click "Create".
- You should now see the new Business Grouping in the business grouping tree.
Map Resources to Business Groupings
As part of onboarding to the Vega Platform, your Customer Success Manager will drive the process of mapping resources to the defined Business Groupings. Once those mappings are complete, each Business Grouping will only show resources appropriate to that group.
View/Edit a Business Grouping
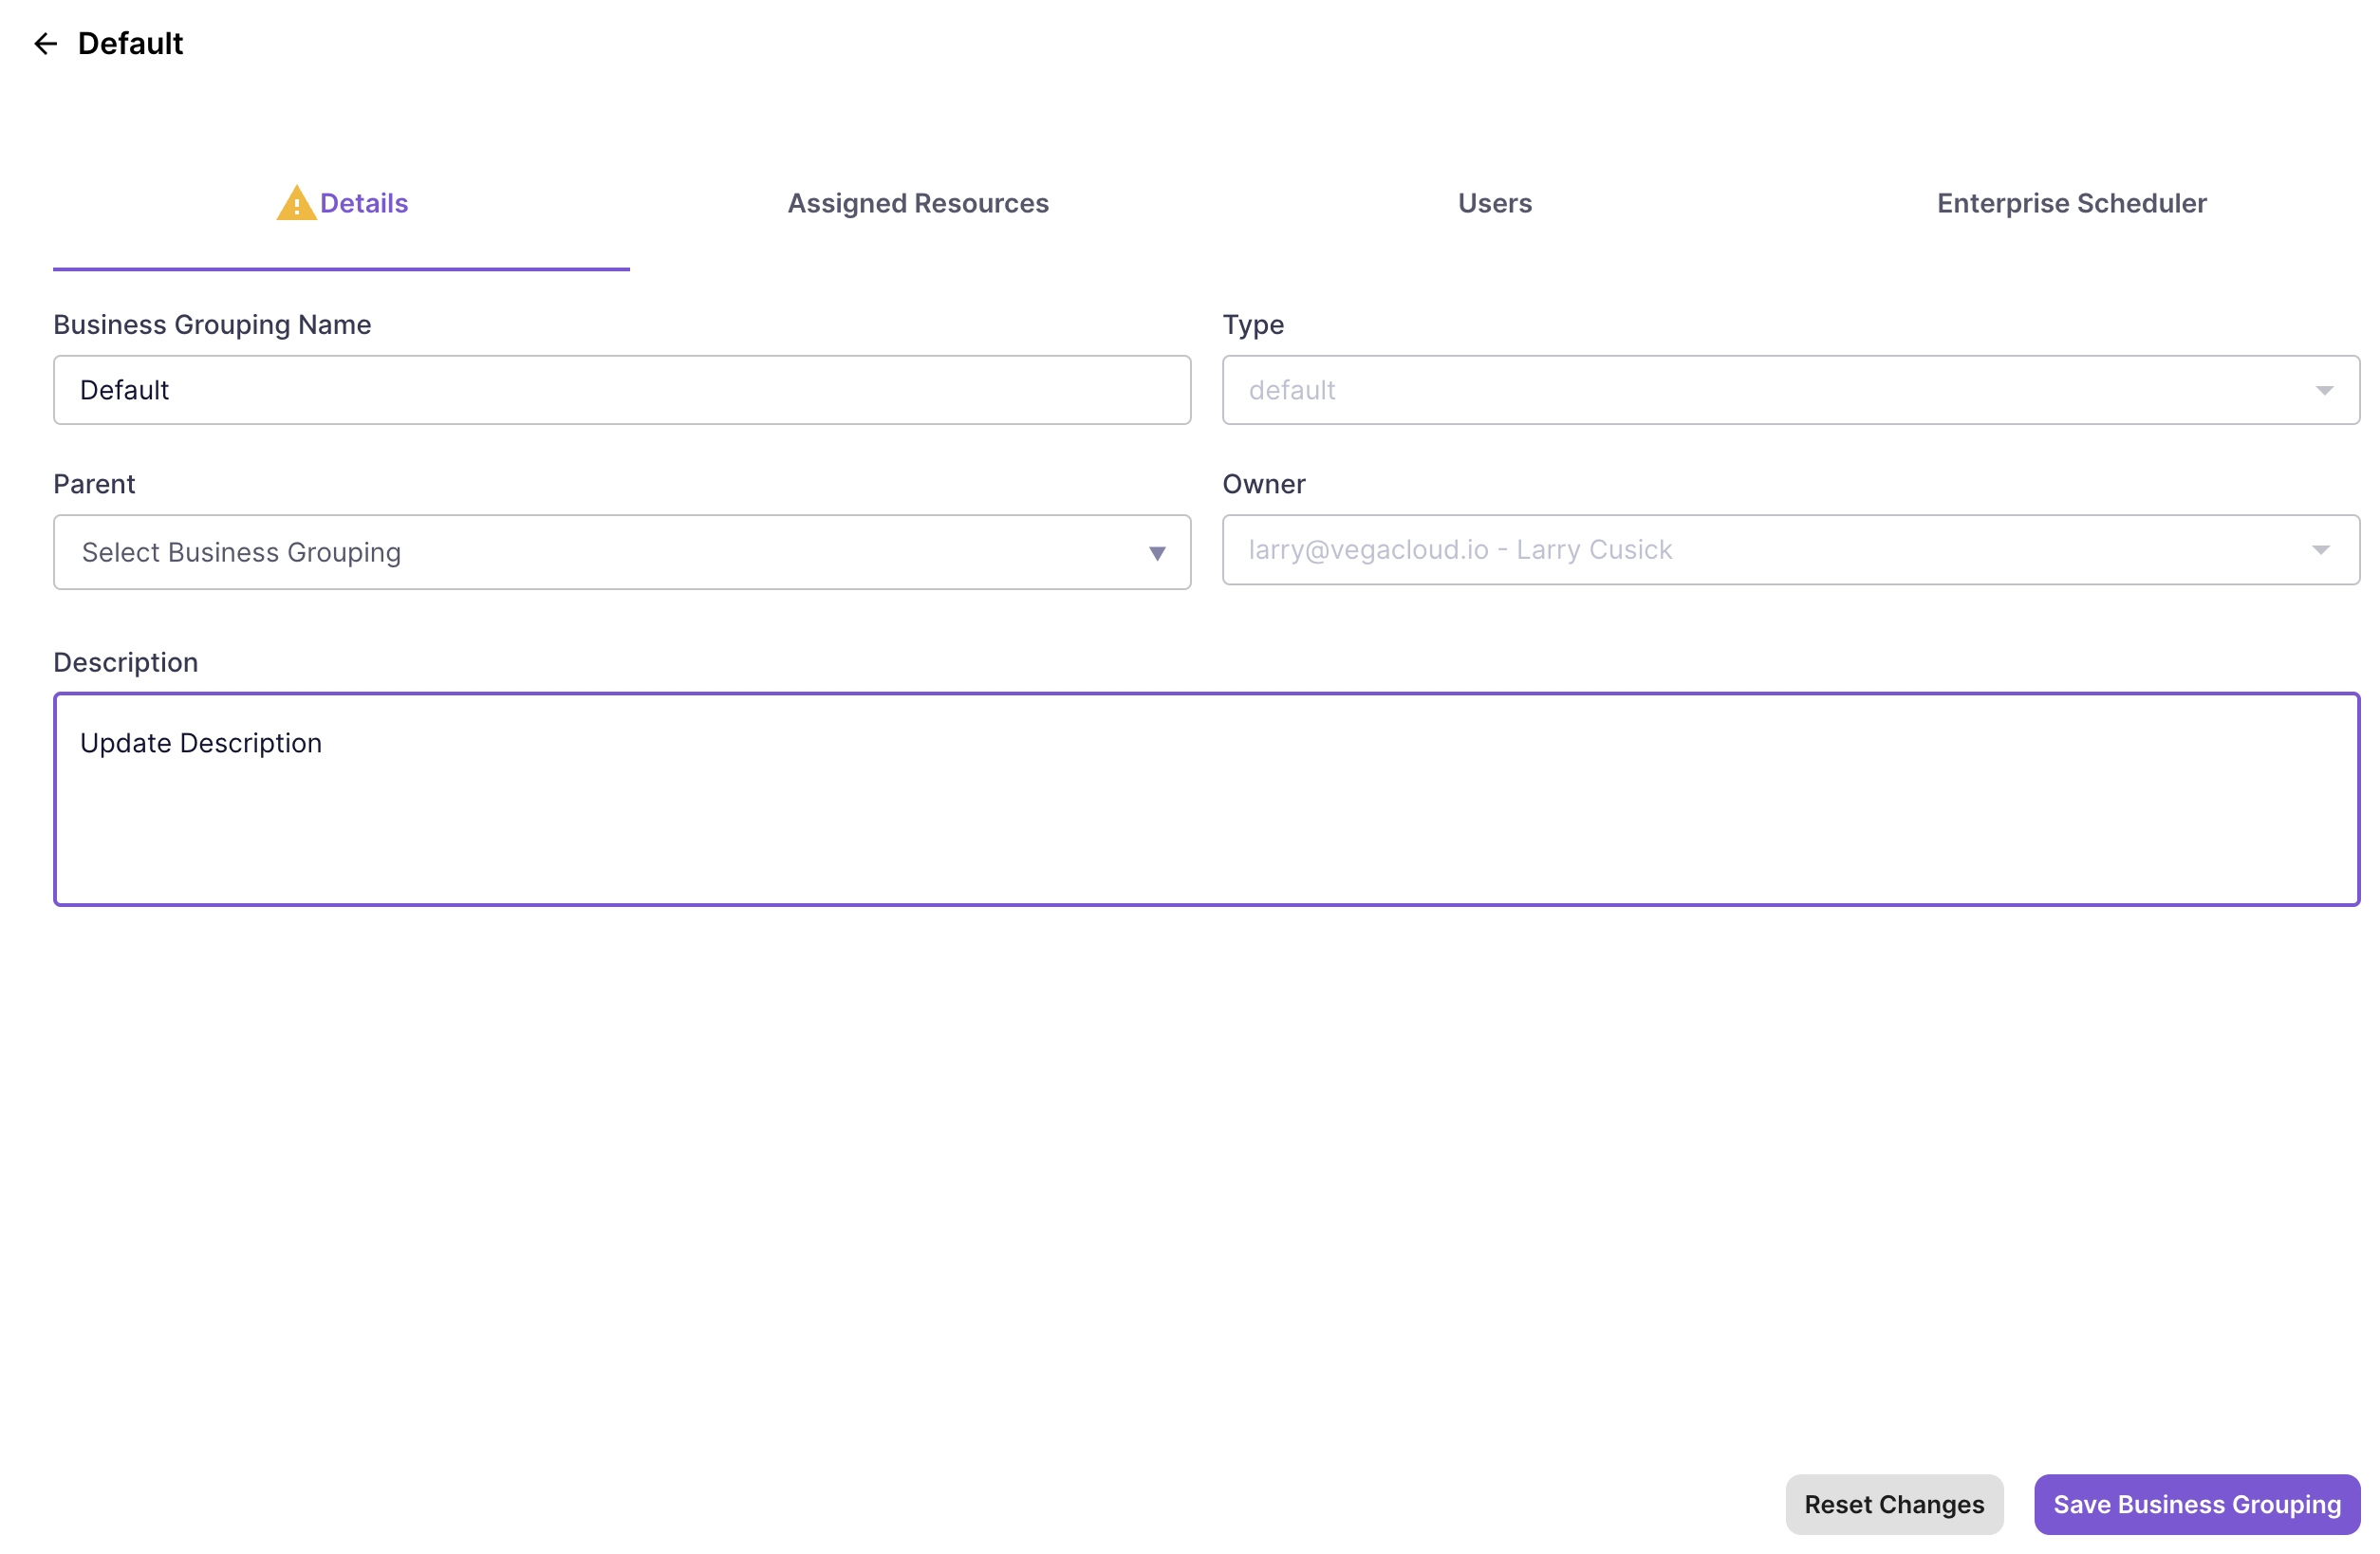
Once a Business Group has been created, you can view the details of the Business Grouping by clicking the "View Details" icon in the "Actions" column in the Business Grouping tree:
tipClick on the "Users" or "Schedules" icons to open those tabs directly.
The following tabs are available depending on your plan:
- Details: Optionally update the Business Grouping Name, Type, Parent, or Description.
- Assigned Resources: If your resources have been mapped to the Business Grouping, this tab will show a list of the resources assigned.
- Users: Optionally assign or unassign users, or Switch Owner for a Business Grouping.
- Enterprise Scheduler: If the scheduler feature is enabled for your account, this tab will be displayed and list any Enterprise Schedules that were configured for the Business Grouping.
For any edits to the tabs above, be sure to click "Save Business Grouping" at the bottom right. There is also an option to "Reset Changes" to revert any of the tab edits that were made.
Switch Owner for a Business Grouping
If you need to change the owner of a business grouping, use the Switch Owner option under the "Users" tab of the Business Grouping:
- Navigate to the "Users" tab for a Business Grouping.
- Locate the current Owner of the Business Group. (The user will have the "Role" of Owner, and the "Actions" column will show the Switch Owner option.)
info
For the Switch Owner option to be active, the Business Grouping must have another user assigned that is not the current Owner.
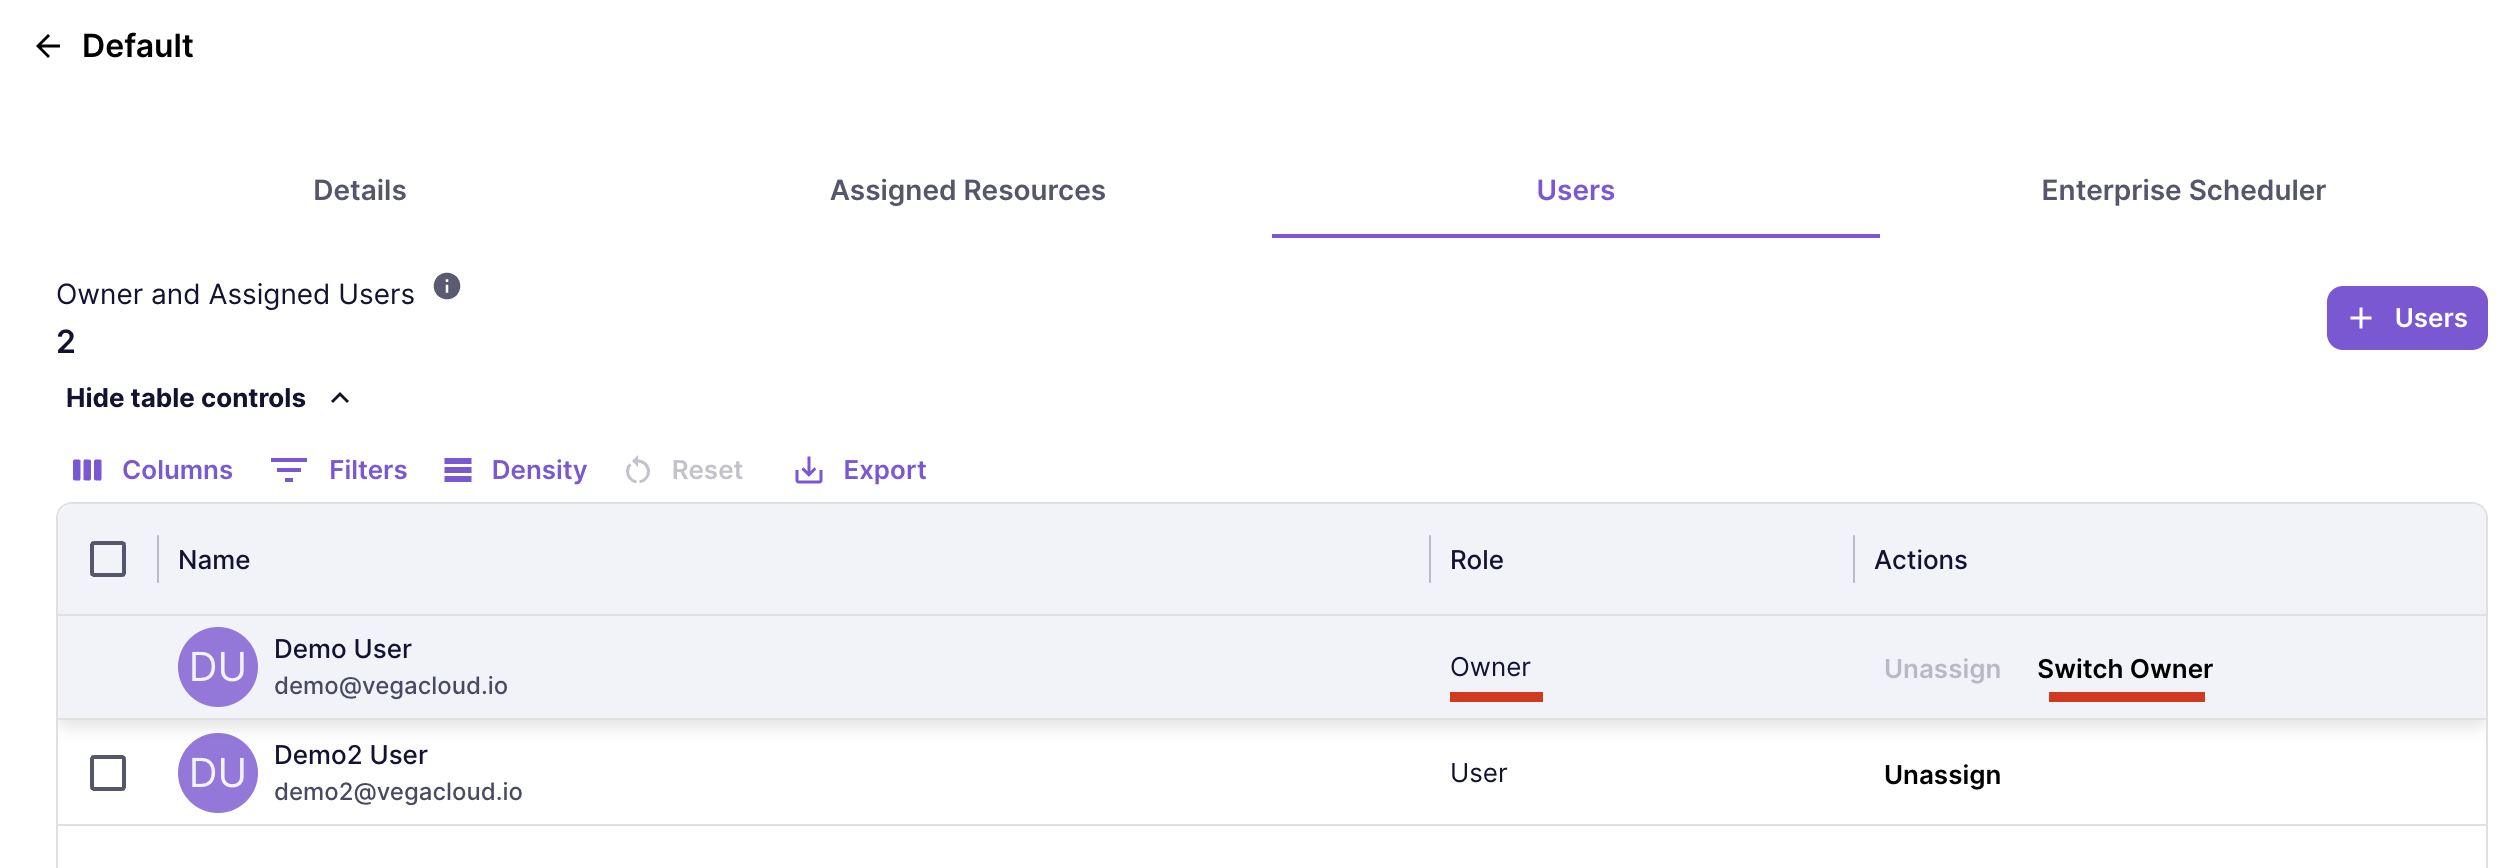
- Click the Switch Owner link to open the "Switch Owner" dialog. Select the new Owner (user) from the drop down. Click the "Switch Owner" button:
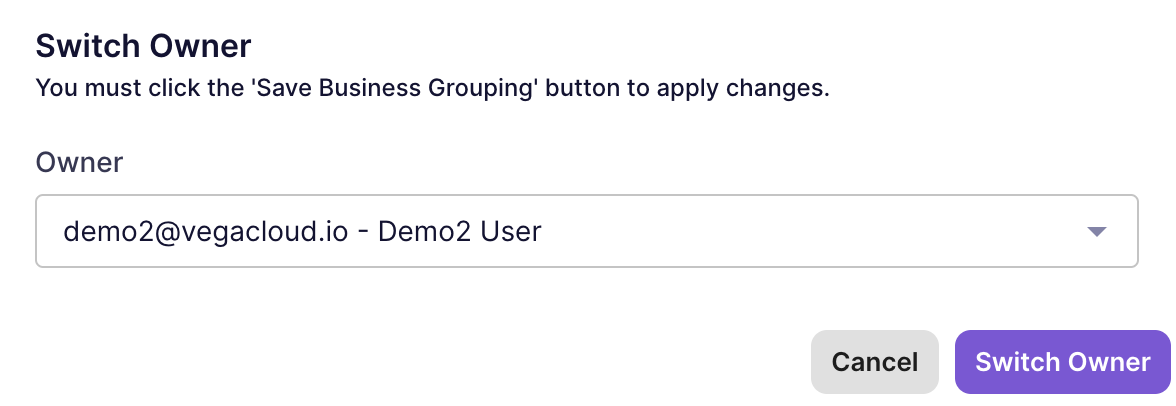
- The user from the previous step should now show as the Owner in the "Users" tab. (The user will have the "Role" of Owner, and the "Actions" column will show the Switch Owner option). The previous Owner of the Business Grouping is converted to a User role for the Business Grouping.
- Click the "Save Business Grouping" button to apply the change.
Deleting a Business Grouping
Business groupings cannot be deleted via the UI at this time. If you would like to delete a business grouping, please contact your Vega Customer Success Manager.
